Showing posts with label Conversions. Show all posts

Tuesday, 14 January 2014

Die Volksschutzmann kommt!

Working the 1813 "Befreiungskrieg" theme, I decided I needed a LOT of Landwehr style fellas.  As an unabashed cheapskate, the IKEA box full of Warlord plastics appealed.

However, rather than just paint them in an alternative colour scheme, I decided an head swap would help to lift them from mediocrity.  Now I have a use for all those spares wearing Russian shako!

Reichskreis Volksschutzmann.


Ten minutes with the power drill, toolkit and a dab of Squadron putty smoothed with Testors cement enabled a workable solution.  I am especially pleased that I have found a use for those rather poor Prussians!  When I am in "full production" I reckon I will use Milliput rather than the aggressive and smelly solvents.

Finally, the song of the Peoples' army (please excuse any grammar errors, my German is basic!  Please feel free to highlight my mistakes!)


Die Straße frei der Volksarmee! 
Offene Tore für die Volksschutzmann! 
Wir folgen dem leuchtenden hoffnungs fahne, 
Der Tag der Freiheit und Freude bricht an!


Sunday, 12 January 2014

1813 Reichskreis Infantry

Mademoiselle Biche.


When a relatively quiet Sunday presents itself, grab it with both paws!  The ladies are out, son on the PC and "La Biche" sleeping on the sofa.  I put some Bruckner on the stereo and got chopping to see if I could create something a bit "different" from the various plastic sets I have lying about.

They fit well on the 40mm base.


Working with some Warlord Russians as a base (I have hundreds after an Ebay score) - I added Perry KuK helmets and some Victrix French backpacks (I may well use some Warlord French backpacks too) I then slapped them on a custom "Warbases" 40mm squares to see if they looked OK.

Lots of variety is possible.


I think they do the job quite nicely, looking suitably "composite" like so many of the conteporary "Zwergstaat" armies.  Most importantly, they don't resemble simple head swaps!

Now granted, the Warlord hands are BIG but I think they are acceptable.  I may add sabres or save these for the Grenadier battalions, I will see how the glueing goes - I want to keep assembly relatively fast as I am going to need at least four 24 man units of these chaps and they require a bit of plastruct work around the collar stock.

French backpacks pre-surgery.


These will probably appear Saßenlander Gray or Teschenburger Red.

Next up is a mounted officer to be patched together, probably from bits in the Victrix KuK box...

UPDATE: Whilst fiddling about trying to slice a whole lot of collars I decided a simple Milliput push-mould would be best.  Now I am waiting for it to cure so that I can get assembling!  It will just end up as a notched spacer to liquid glue in place. I think I will use the pause to get a unit ready for assembly.

Friday, 20 April 2012

Dabbling with the 1840s

Poor quality photo courtesy of HTC mobile.
After a long hiatus and a good deal of personal problems, I suddenly got the urge to do something mid C19!

I bought some of Ebor Miniatures' Crimean Russians as they looked different and were very cheap.   The figures arrived (along with some of their lovely early C18 offerings) and unfortunately I got quite a few breakages.  The proprietor was a real gentleman and sent out replacements telling me to keep the "deaders".

Last weekend, during a rare moment of mental composure, I decided to cobble together a model to represent His Majesty König Ferdinand II in all his martial glory.

I had a dig about in the boxes of lead and decided on an Essex body (Russian Nap. Officer) with an Ebor head.  This figure will be mounted upon an heavily butchered Foundry (British) horse and given a Perry pelisse as "icing".  In true mid-C19 form I added an outlandish caterpillar crest (in three stages) and bulked up his face-fungus.

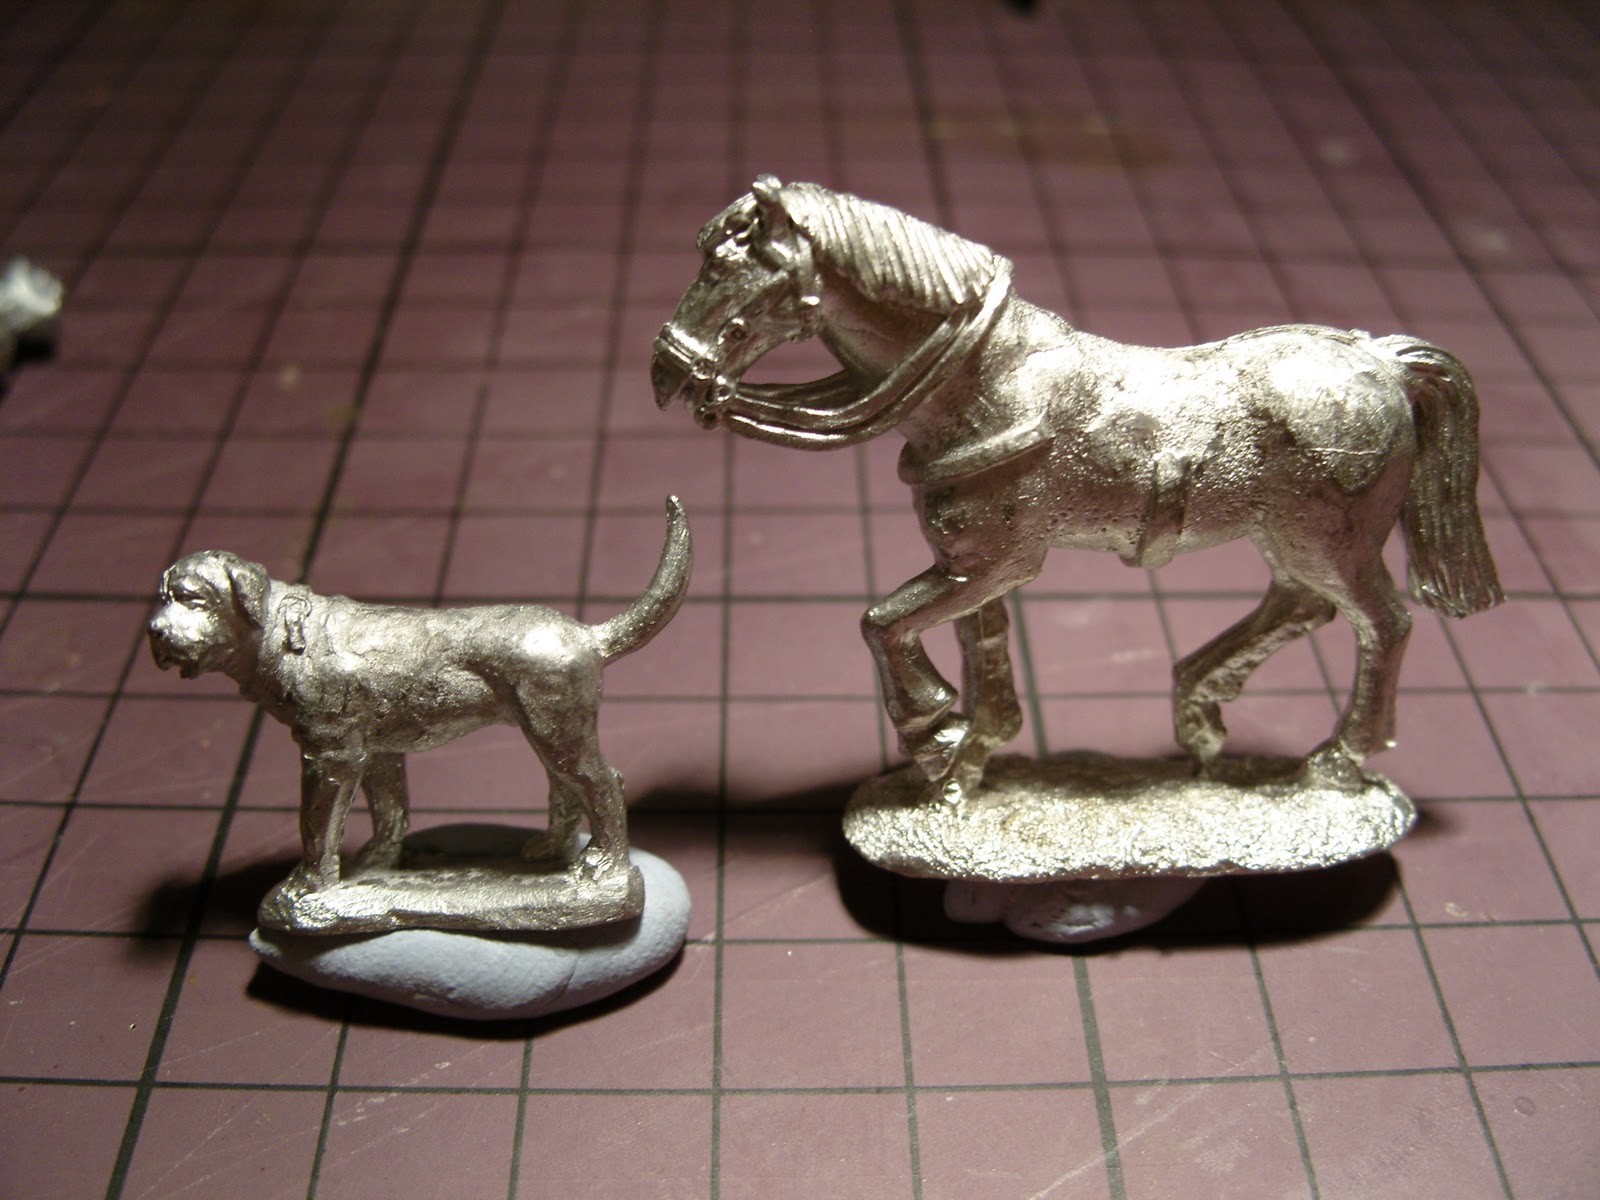
I think he looks suitably "OTT" and he will be improved when the pelisse is fitted, collar properly finished  and furry horse furniture is sculpted.  I intend to finish him soon and perhaps even paint him too!  Ferdy and nag will be mounted upon a 40mm steel washer with sculpted groundwork and his hound running alongside.

I would be interested to hear what people make of him and indeed if there are any other mid-1800s ImagiNation projects out there.

Sunday, 9 October 2011

Leibgarde Uhlanen-Regiment

Whilst waiting for the plastic bits and pieces to arrive (they have now - more of which later) I had a think about the cavalry component of a "Napoleonic" era B-S army.

By this time the State had expanded eastward and the main enemy remained the perfidious Turk.  Added to this foe are the various petty warlords in the colonies.  Considering the near-Medieval nature of Oriental armies, it seemed only natural that armoured lancers would be desirable.  Such troopers would have a degree of protection from missile fire plus the extra reach to hit the enemy first - well that's the idea anyway!

The components.
Trawling around for figures I realised I would have a limited choice, namely Cuirassier standard/guidon bearers.  I didn't want to go French as the geographical location and politics of my ImagiNation do not suggest Francophilia.  The choice was further simplified by a trip to Leigh-on-Sea (to collect a parrot - bizarre I know) which is pretty close to the Essex Miniatures factory...

I made a shortlist and went into the showroom for a browse.  I decided that the best figures for the project were the later Russian Cuirassiers.  The only downside was that they sport the "brush" type crest rather than the caterpillar I wanted.  Yes Essex do the earlier style but the standard bearer does not have quite the right look for use as a lancer.

I have tentatively selected a Dixon horse as it is a great little figure and there was one in the spares box.  Yes the shabraque may need work but this will be determined as I go.

Working on the plume re-sculpting has been most frustrating as my usual putty mix didn't work well - this will be the subject of a future posting.  I want to simplify the conversions as I need 10 of these (plus command) for the Regiment so the work will be kept as minimal as is possible.

More to follow...


Sunday, 30 January 2011

Mammoth surgery

The re-do and the original.
On Friday evening I cleaned up the body halves and tried to secure them together.  This initial attempt was made with styrene spacers and five-minute epoxy adhesive.  It proved to be a disaster!  The epoxy did not set properly and I was left with sticky gunk all over the components.  Needless to say I was annoyed.

After an over-night soak in Nitromoors paint stripper, the bits were nice and clean again.   I decided upon a different approach using pins (or in this case dowels)  I drilled four holes in each half.  These passed all the way through one side so that I could fine tune the positioning of the parts before they set.  The dowels were held in place with super-glue (no more epoxy on this one) and then tweaked around until the body halves were in the right position.

The dowel work is far from subtle!
To further secure the parts, I filled the gaping cavity with a good deal of Milliput.  This was then brought to a level slightly below the intended surface of the beast's "skin".  This was so that the fine detail of the skin could be easily applied when the model was finished.  After another over-night, this time in the airing cupboard, the model is a solid and heavy lump of a Nellie.  The dowels will be trimmed and the holes filled or covered.  The damage on the beast's back will be obscured by the howdah padding.  

Annoyingly, I seem to have misplaced his tail!  It came off neatly but I cannot find it.   Hopefully it will turn up but if it doesn't I can sculpt a replacement fairly easily.

The first photo shows just how poor the beast looks assembled "out of the box" when compared to a fattened twin.  My wife thought the poor chap looked as if he was dying and on the way to the Elephants' graveyard - I couldn't agree more!

Other components waiting for their moment.
The other parts are from a few manufacturers.  Gripping Beast tusks, Essex head and mahout with a Foundry Sikh who is likely to lose his head in the interests of affairs Colonial.  This fellow may get a reprieve if I go with one of the Redoubt chaps who are presently "in the mail".

Bear in mind this is in a very early stage of construction, however I think it is potentially useful for anyone considering a similar project.  Although I wouldn't advise anyone to bother with OG elephants unless they had masochistic tendencies. 

Tuesday, 11 January 2011

The Army in miniature: IR.10 " von Klingenbach " pt.3


"Donors" pre-op.
Last night it occurred to me that the process of swapping a awkwardly positioned head may not be something with which all my readers are familiar.  Just in case, here is a step by step guide as to how I effected the transplant.

The first thing to do is select figures to provide the components.  "Obvious!" I hear you cry but this is not as easy as it appears.  There are a lot of different sculpting styles in the 28mm bracket and many are blatantly incompatible.

I wanted a head wearing a "Mirliton" so my choices were limited.  The venerable Dixons Chasseur (FNC5) is easy to decapitate and leaves a perfectly usable body once this is done - ideal for cheapskates like myself.  In terms of size he is a fairly good match for the Crusader Fusilier (RFH009) Additionally, he is of a similar sculpting style showing a roughly equal level of detail.

The Chasseur's head was removed with a simple horizontal cut.  Once cleaned up, it was hand-drilled (pin-vise) to take a neck-pin (wire or cocktail stick)  As discussed yesterday, the plume was removed to ensure that the hat sits properly against the musket.  A replacement will be built from epoxy putty.

He looks apprehensive and who can blame him.
The Fusilier is a different story, his hat is cast butting against the musket and thus the head cannot be saved intact.

I made the vertical razor-saw cut first, carefully avoiding the musket.   Then the horizontal slice was performed to enable the head to be removed.  A good deal of mess is left to clean up but this is sadly unavoidable.  Annoyingly, I dented the barrel slightly when my toddler bashed the workbench at the critical moment - this is now repaired.

The collar was removed entirely and the neck drilled out (motor tool) to provide a "female" in which to insert the neck pin.  Remember to ensure that the figure has a realistically scaled neck - it is a very easy thing to overlook.

At this stage my method departs from the norm as I like to create an oversize socket that gives me some "play" when positioning the transplanted head.  This socket is filled with epoxy putty (Kneadatite & Milliput blend) and the head is inserted.

Epoxy putty is used to hold the head to the barrel.
This results in the putty being squeezed upwards and suction tends to hold the pin in place.  After a bit of judicious wiggling (Michael Douglas style) I had  the attitude I wanted.

The last part of the preliminary is to carefully remove the soft excess putty whilst leaving enough to support the new head.  I do this with cocktail sticks and/or Dental probes and smooth with a wet paintbrush.  At this stage you do not have to be too fussy as the details added in the finishing stages will obscure the finish.

Leave the little fella overnight (somewhere warm) or put him under a lamp to accelerate curing.  That's one down, five more to do before I can get them to the next stage:

The real sculpting work...

Monday, 10 January 2011

The Army in miniature: IR.10 " von Klingenbach " pt.2

IR.10 The components.
After looking at the crudely made composite in my last posting, I decided he had to be redone!  The shako needed to sit flush with the musket and this necessitated the removal of the entire plume.  Not too much of a worry as building half a plume and ensuring it matches a pre-existing feature is more work than doing the whole thing from scratch!


Anyway, I have collected the metal components for a group photo.  They comprise 20 Crusader French Fusiliers (selected at random from miscasts - part of the compensation I obtained from Northstar) The Command Group will feature a standard bearer (converted from a Crusader French NCO) a Drummer from Foundry (via Dave T's bargain box) and "von Klingenbach" himself.  He is a part-finished conversion of a Dixons Chasseur and will sport an animal skin cape in the style of von Zieten.  His head is from a Foundry cavalry bugler and his horse will be from Front Rank (I think I photographed him on a Crusader nag by mistake)

Von Klingenbach in all his half-built glory.
Other items used are a couple of Mega Miniatures dogs (yes another headswap!) and a flagpole finial from Front Rank.  You will note the bags at the top of the photo.  These contain more unfortunate Dixons donors - please don't inform them of the fate that awaits.

Bases will be purchased from Warbases  who provide laser-cut MDF in a wide range of sizes at ridiculously low prices - £2.00 gets you 16 40x40mm bases!  The standard will be custom printed on silk by Maverick Models and will apparently cost no more than £2.00.


All things considered once the work is done this should be a very cost-effective, unique and attractive Regiment.

Now that I have my miniatures the floodgates are truly open and my enthusiasm has returned!  I hope my very rusty painting skills can do justice to my idea...

Sunday, 9 January 2011

The Army in miniature: IR.10 " von Klingenbach " pt.1

The basic concept.
I apologise as I have not yet posted the relevant uniform card and potted history of this Regiment but that will be remedied later this week.

So at the risk of getting ahead of myself I thought readers would be interested to see my concept for one of the "new" Regiments formed when the armed forces expanded.

The Grenadiers are going to have an unusual appearance as shown by the very crude composite figure in the picture.  Wearing a decidedly French coat with turnbacks and a most decorative "Flügelmütze" style hat.

The body is from a Crusader French fusilier and the head taken from a Dixon French Revolutionary Chasseur à Cheval.  The latter are very nice figures and often overlooked these days.  They have a few flaws but are going to serve me well in many ways!

The transplant was rather difficult and resulted in some damage to the musket - as can be seen.  I hope to eliminate this during the other surgeries that will be required to create a full compliment.  As this was something of an experiment I am quite happy with the basic result.  Rebuilding of the collar and some fine details should result in an attractive and unique figure.

The uniform will be the standard "Mustard" coat with blood red facings and silver lace/buttons.  All in all pretty striking.

Along with this chap I was today building the Colonel but he is unavailable for a snap due to being baked in my "Coke Can Putty Oven".

More on this in the very near future...

Tuesday, 14 December 2010

Graf von Zsadány - A work in progress

The Colonel rides a Crusader nag.
It has been a slow few days here at "Schloss Krautheim".  Generously, the children have shared their various illnesses and the adults are not feeling too well.

In lieu of the article I wished to post, I thought this may be of interest.   Tentatively labelled "von Zsadány" of IR.3, this figure is intended to depict a Colonel of an "Hungarian" Regt.  He wears a plain jacket and drapes a pelisse over his shoulders for a touch of flamboyance.  I could have used an Hussar with dolman but I rather like the contrast between plain and ornate coats.


The origin of the components is partly unclear.  The figure is a Foundry Russian (I think) liberated from Dave T's "bits box".  He had a nasty face with protruding mouth - very Simian.  I transplanted a Front Rank Austrian head and affixed a spare metal pelisse to the torso - yes it is attached very far forward and this is intentional!  The latter was heavily ground-down to make enough space for the former to be seated.


As always, detail work is required but I think the figure "works".


Another "WIP" taster is the Iroquois man-servant that I have been planning for a fairly long time.  In the spirit of frugality *cough cheapskate* I have used the body from which I took von Heßlingshof's head.  His new head is taken from a Front Rank "Woodland Indian" and looks suitably grizzled.


Thus far he has lost his right arm and been drilled to receive the various pins.  In addition I have removed the scabbard moulded attached to the left leg.  There will a suitable substitution added to this area. A fair bit of clean-up and carving still to do on this one but I can see what is needed in my "mind's eye".


Hopefully work on these will progress over the next few days.


Sunday, 5 December 2010

Freiherr von Heßlingshof - Pinning and Putty

Looking a bit like Donald Sutherland.
Shortly after taking the photos last night, I drilled the components and inserted various pins and pegs.  These are essential when converting metal castings as otherwise you are liable to suffer from a multitude of disastrous accidents.

I retained the nice bow on the neck of the Front Rank figure and I have counter-sunk this into the shoulders of the Crusader casting.  I was mulling over the whole right hand quandary and decided that the sword will have to do.  A cane looks a bit too "FdG" and a telescope is not really very good for a chap leading his Regiment to within sight of the Turk.  Myopic officers are something of a liability.

Moustache will need a bit of refinement but the plume is nearly done.   They are currently baking under a cheap IKEA desk light.

The Mastiff will go without appendages as I felt creeped out try to sculpt 28mm testicles.  We will just remember that it is a male!

For the putty I have used both pure Kneadatite and a Milliput/Kneadatite blend.  They have different properties and mixing allows the sculptor to take advantage of both.

I should be able to get the figure finished in the next day or so.  Now that reminds me, I need some laser-cut bases...

Saturday, 4 December 2010

Freiherr von Heßlingshof & Gustav - The beginning

Having made my decision to bin Campaign Cartographer 3, I was freed to potter about with something else this afternoon.

Crusader Austrian General and Front Rank Baggot's Hussar.
I have mentioned before that I hate using stock figures for my Colonels and Generals.  With this in mind I decided to cobble something together from a few spare parts lying in my C18 boxes.

Wanting a fellow in "Austrian" uniform but with a twist, I decided to used one of the figures from Crusader's High Command pack.   The original is OK (ignoring that weird right arm) but rather boring - so I didn't mind sawing off his head.  As I have a whole host of miscast Baggot's Hussars from Front Rank, I decided one of these could donate both head and right hand to the project.

Gustav the Mastiff and the trusty steed.
I wanted to use a rather nice Dixon's horse for his mount but the rider's legs are spread (ooer Missus) rather wide for this to be practical.  I will give it a go but reckon it is safer to go for a Crusader nag (shown)

Gustav the hideous Mastiff is taken from the Vendel "Border Reiver" range and looks fearsome enough to be happy amidst the carnage of battle.

The Colonel's right arm is still "negotiable". I favoured a tobacco pipe or even a telescope as these are far more interesting than the drawn sabre - but I have the sword from the Hussar donor.  As the pinning and puttying happens I may well change the plan.

Mock-up to get a General (hoho) idea.
Other additions will be a plume, face fungus and an enlarged "bag" for the cap.  I may well rework the saddle - a furry shabraque would look somewhat different.  Gustav demands a little work, a pair of large "cojones" should add authenticity.

You may notice the little bit of putty in the last photo.  This is a push-moulded depiction of the "Order of Radegast" that Freiherr von Heßlingshof will sport upon his coat (if it can be made to fit)

Anyway - we will see how things progress.

Sunday, 21 November 2010

Operation! - The preamble

After a visit to Warfare! this weekend, I found myself with some new donors for my latest surgical projects.  As I never like to use stock figures as Colonels or General staff, I thought it essential to get some colourful components from which I can create a few unique models.

I intend to post some step by step conversion articles in the near future.  These will show the components, work performed and (hopefully) the finished article.  First on the cutting mat is a fellow made from three different manufacturers' components  and a good deal of epoxy putty.

I will take some shots later (once my camera has recharged) and hope the photos will prove to be of interest.  Now, just how does one sculpt fluffy looking Ostrich feathers using "greenstuff" and toothpicks...